
The Art of Crafting Handmade Candles
- Ayden Gonzalez
- Jan 12
- 5 min read

There’s something truly magical about lighting a candle you made yourself. The soft glow, the gentle flicker, and the subtle scent all come together to create a cozy atmosphere that feels personal and warm. I still remember the first time I melted wax on my stove, nervously stirring in fragrance oils and carefully placing the wick. It was messy, a little smoky, but absolutely thrilling. Crafting handmade candles is more than just a hobby - it’s an art form that invites creativity, patience, and a touch of love.
If you’ve ever thought about trying your hand at candle making or even turning it into a small venture, I’m here to share what I’ve learned along the way. Let’s dive into the world of candle crafting and explore how you can create beautiful, personalized candles that light up any room.
Why I Fell in Love with Crafting Handmade Candles
I’ll be honest - I didn’t start making candles because I wanted to be an expert. It was more about finding a relaxing, creative outlet after long days. The process is simple but rewarding. You melt wax, add scents and colors, pour it into molds or jars, and wait for it to set. But the magic happens in the details.
Choosing the right wax, picking scents that tell a story, and experimenting with shapes and colors made every candle unique. I found joy in customizing each one, imagining who might light it and what memories it could spark. Plus, handmade candles make the best gifts. I’ve given candles to friends and family, and seeing their faces light up when they unwrap something so personal is priceless.
If you’re curious about starting your own candle journey, here’s what I’ve learned about the craft and how you can make it your own.

Getting Started with Crafting Handmade Candles
Starting is easier than you might think. You don’t need fancy equipment or a big budget. Here’s a simple breakdown of what you’ll need and how to begin:
Materials:
Wax (soy, beeswax, paraffin, or blends)
Wicks (cotton or wood)
Fragrance oils or essential oils
Candle dye or color blocks (optional)
Containers or molds (glass jars, tins, silicone molds)
Double boiler or a heat-safe pouring pot
Thermometer
Stirring utensil
Steps:
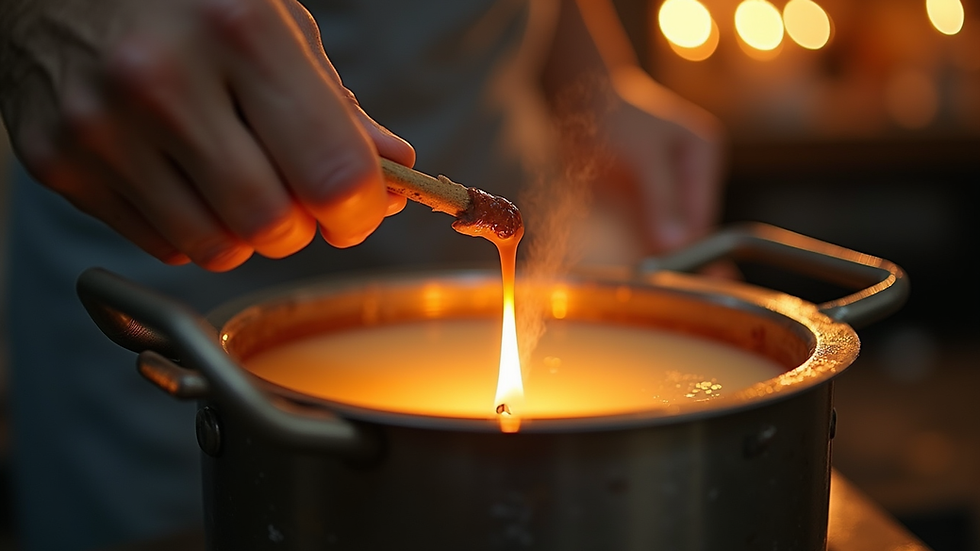
Choose your wax: I prefer soy wax because it’s natural, burns cleanly, and holds scent well. Beeswax is great if you want a natural honey scent and longer burn time.
Prepare your workspace: Cover surfaces with newspaper or a silicone mat. Wax can be messy!
Melt the wax: Use a double boiler to gently melt the wax. Keep an eye on the temperature - usually around 170-180°F is ideal.
Add fragrance and color: Once melted, remove from heat and stir in your fragrance oils and dye. I like to add about 6-10% fragrance by weight for a strong scent.
Attach the wick: Secure the wick to the bottom of your container using a wick sticker or a dab of hot glue.
Pour the wax: Slowly pour the wax into your container, leaving a little space at the top.
Let it cool: Allow the candle to set at room temperature. This can take several hours.
Trim the wick: Cut the wick to about 1/4 inch before lighting.
The first few candles might not be perfect, but that’s part of the fun. Each one teaches you something new about temperature, scent strength, and pouring technique.
Finding Your Signature Style in Candle Making
One of the best parts of crafting handmade candles is making them truly yours. Over time, I developed a style that reflects my personality and the vibe I want to create. Here are some ways you can find your own signature:
Experiment with scents: Try blending essential oils like lavender and eucalyptus or go for seasonal scents like cinnamon and pine. Don’t be afraid to mix unusual combinations.
Play with colors: Use natural dyes or candle-safe pigments to create soft pastels or bold, vibrant hues.
Choose unique containers: Vintage teacups, rustic tins, or minimalist glass jars can all change the feel of your candle.
Add decorative touches: Think dried flowers, herbs, or even small charms embedded in the wax.
I once made a batch of candles inspired by my favorite beach vacation - sea salt, driftwood, and a hint of citrus. They were a hit with friends and sparked lots of compliments. Your candles can tell stories, evoke memories, or simply brighten a space with their beauty.

Tips for Growing Your Handmade Candles Business
If you’re thinking about turning your passion into a handmade candles business, there are a few things I wish I knew when I started. It’s not just about making great candles - it’s about connecting with people who appreciate what you create.
Focus on quality: Use the best materials you can afford. Customers notice when a candle burns evenly and smells wonderful.
Create a brand: Think about what makes your candles special. Is it the scents, the packaging, or the story behind them? Build your brand around that.
Engage with your audience: Social media is a great way to share your process, get feedback, and build a community.
Offer customization: Personalized labels, scent blends, or special packaging can set you apart.
Start small: Sell at local markets, online platforms, or to friends and family. Use their feedback to improve.
Keep learning: Attend workshops, watch tutorials, and stay curious about new trends and techniques.
Building a business takes time, but every candle you make is a step closer to sharing your passion with the world.
My Favorite Candle Making Hacks and Tricks
Over the years, I’ve picked up some handy tips that make candle crafting easier and more enjoyable. Here are a few I swear by:
Use a slow pour: Pouring wax too quickly can cause bubbles or uneven surfaces. Take your time.
Preheat containers: Warm your jars slightly before pouring to prevent cracking or sinking.
Secure wicks with clothespins: Rest a clothespin across the top of your container to keep the wick centered.
Test scents in small batches: Before committing to a large batch, make a small candle to see how the scent performs.
Label your candles: Keep track of your recipes and results. It helps you replicate favorites or tweak less successful ones.
Clean up with hot water: Wax can be tricky to clean, but soaking tools in hot water softens it for easy removal.
These little tricks save time and frustration, making the process smoother and more fun.
Why Handmade Candles Make the Perfect Gift
There’s something special about giving a candle you made yourself. It’s a gift that says you care, that you took the time to create something unique. I’ve gifted candles for birthdays, holidays, and just because moments. Each one feels like a warm hug in a jar.
Handmade candles can be tailored to the recipient’s tastes - their favorite scents, colors, or even a personalized message on the label. They’re perfect for anyone who loves cozy evenings, relaxing baths, or adding a touch of charm to their home.
If you want to impress someone with a thoughtful, heartfelt gift, crafting a candle is a wonderful way to do it.
Crafting handmade candles has been a journey of discovery, creativity, and joy for me. Whether you want to light up your own space or share your creations with others, the art of candle making offers endless possibilities. So grab some wax, pick your favorite scents, and start making your own little lights of happiness. You never know where this craft might take you.


Comments